
In 2023, I switched from Linux to macOS. I used Linux for years, mainly because it supported Docker natively. However, during a system update, I encountered a problem with the video driver that cost me an entire Saturday searching for solutions, tweaking files I didn't even know existed until finally, at the end of the day, I found a workaround to get the darn Nvidia driver working.
Come Monday morning, I shared my tech nightmare with a friend at work, who promptly asked:
"Why don't you switch to macOS?"
I replied: "Because it doesn't have native Docker support, and I don't want to use a virtual machine."
With a virtual machine, you have to allocate a good chunk of RAM, not to mention the slower disk processing. While disk speed might not matter much for many applications, it makes a huge difference for a Magento 2 environment.
"Why do you even need Docker?" he asked.
That sparked a quick conversation where he introduced me to Nix and Devenv.
With these tools, it's possible to create a development environment that's entirely reproducible and native to macOS!
It was love at first sight! When I saw it in action, my mind was blown!

During that conversation, I first contacted one of the early versions of Rooter.
Rooter is a powerful command-line tool to automate repetitive tasks in creating and maintaining development environments.
Shortly after, I bought a MacBook and started using `rooter` to manage my projects. Nowadays, I don't have Docker installed on my machine, and I couldn't be happier!
You need macOS operating system and the softwares below installed:
Just follow the instructions on the `rooter` documentation.
Just giving a brief introduction about these tools:
So getting straight to the point, let's set up a development environment to run Magento 2.
At this point, I'm assuming you've got `rooter` and all the necessary tools it relies on installed and ready to roll. Let's dive in!
mkdir -p ~/Sites/magento2cd ~/Sites/magento2rooter env:createRooter will ask what type of environment:
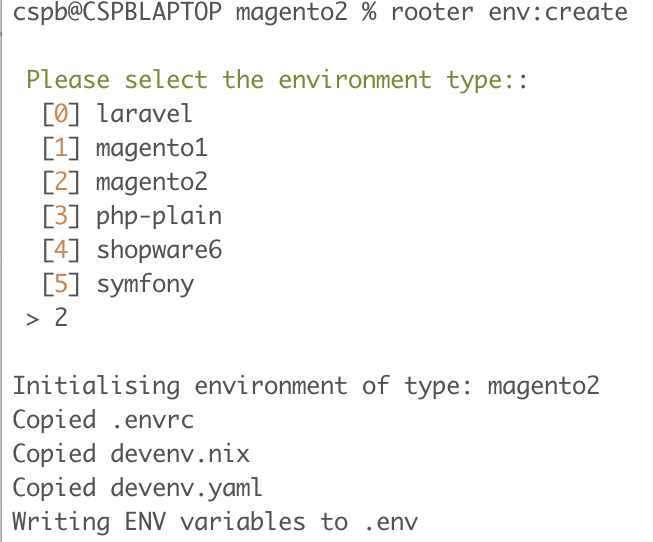
Type 2 and enter for Magento 2
It generated 4 files:
You probably saw this message in your terminal:

You need to allow direnv to execute. Run the command below:
direnv allow .Now you'll see something like this in your terminal:
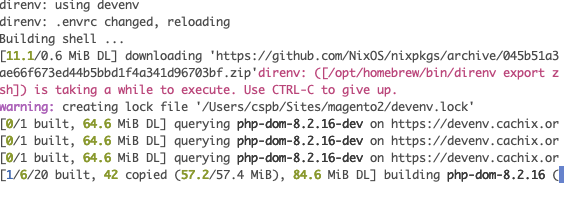
In this moment, your dev stack declared in the devenv.nix file will be downloaded and configured. This is the longest step. Wait until the installation process finishes.
You will see something like this when the process finishes:
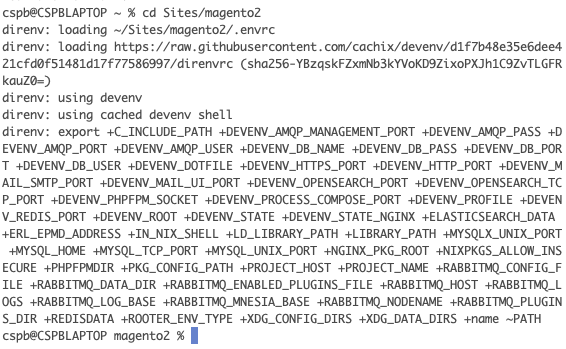
Now, please take a look into this image:
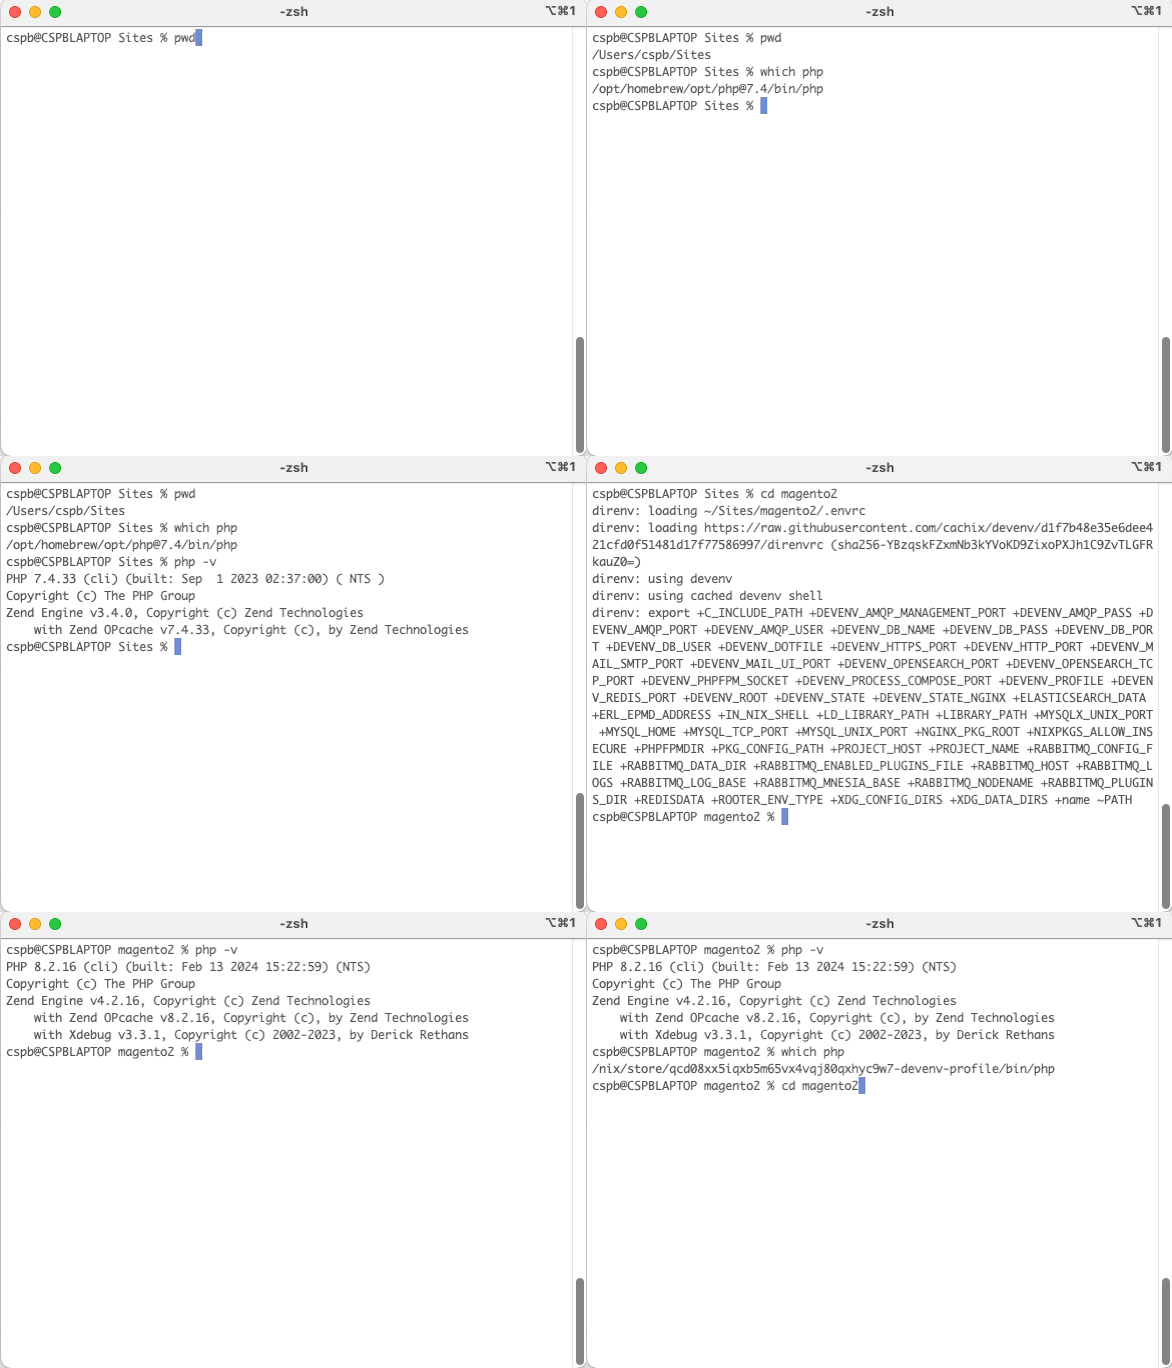
If you've noticed, when I'm not in the project folder, the PHP version in the terminal is different, not 8.2. But as soon as I step into the project folder, direnv works its magic and loads the entire setup into the terminal. Pretty neat, isn't it?
composer create-project --repository-url=https://repo.magento.com/ magento/project-community-edition:2.4.6-p4 magento2-codebaseIt'll clone the Magento 2 repository into a directory named magento2-codebase. Once it's done, just copy everything from the magento2-codebase folder to the current directory, and then you can delete the magento2-codebase directory with the command below:
cp -R magento2-codebase/* . && rm -Rf magento2-codebaseI like to start the environment in the debug mode in the first attempt, because this shows detailed output about the initialization and in case there is an issue, it is visible right away:
rooter env:start --debugBasically devenv will download all services upon first start. That could also be nginx, opensearch, rabbitmq etc.
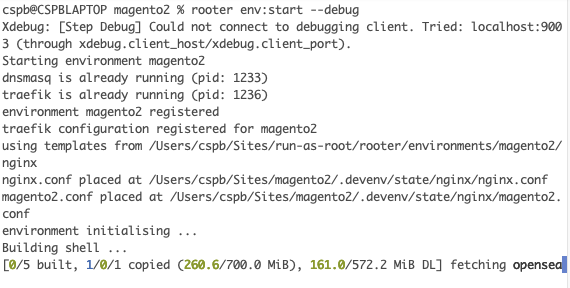
After the first start I like to stop the environment (CMD + c) and start it again without the debug flag:
rooter env:startThe reason being that now it is running in the background rather than the foreground which it was with --debug flag passed.
To see what is the status of the environment, run the command below:
rooter env:statusIt will show something like this:
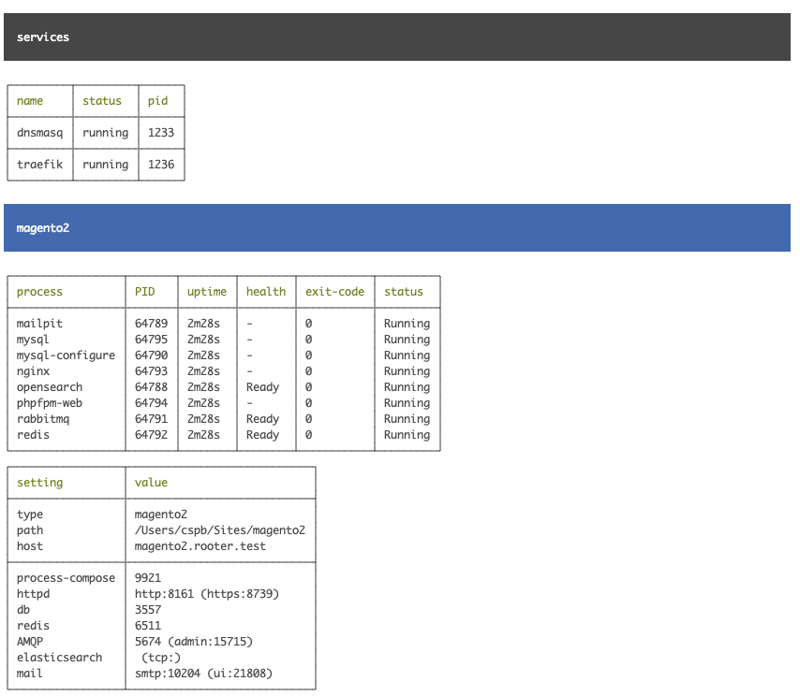
As mentioned earlier, it uses process-compose in the background. There is a command to attach to the process-compose and get a control panel to check the various processes that got launched.
rooter env:process-composeAs you can see in the image below, you can easily switch between the different services and watch their logs update live.
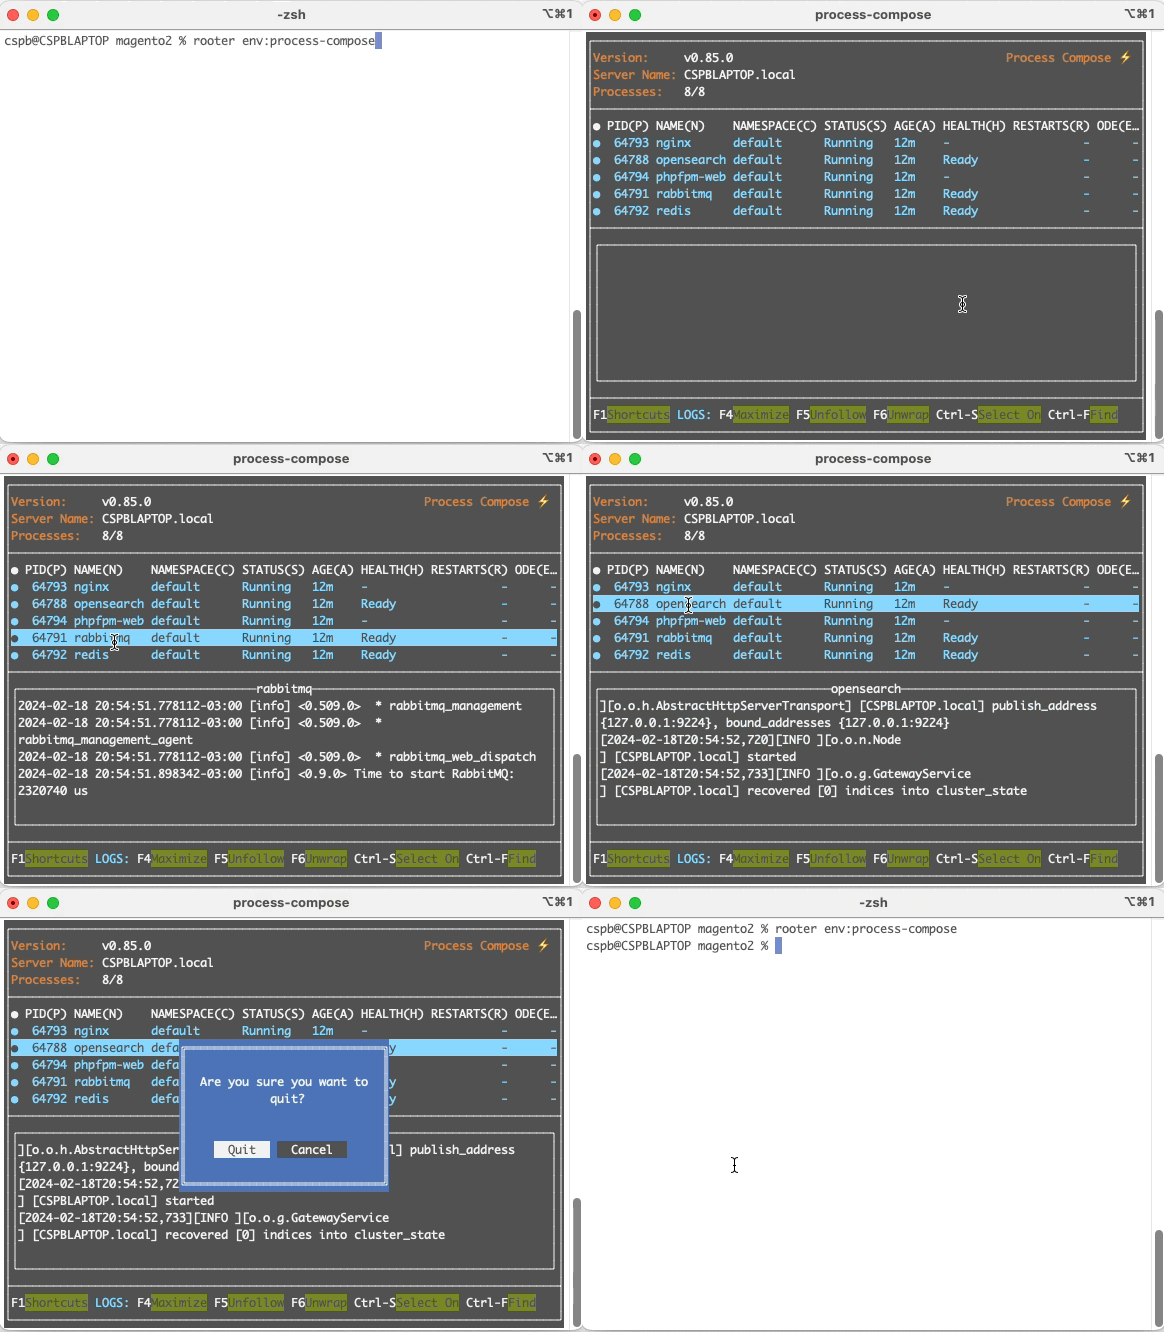
Run the command below to setup the database:
rooter magento2:db-installRooter will drop and recreate the database and by default run the commands below:
An admin user will be created with the username admin and password admin123.
If you pass the option --config-data-import it will run the command bin/magento config:data:import config/store dev/rooter.
Note: The config:data:import is provided by the Magento2-ConfigImportExport module. You need to install it to use the --config-data-import option flag.
You can skip the reindex by passing the option --skip-reindex.
Run the commands below to set some extra configs:
bin/magento config:set web/unsecure/base_url https://magento2.rooter.test/ && \
bin/magento config:set web/secure/base_url https://magento2.rooter.test/ && \
bin/magento config:set web/secure/offloader_header X-Forwarded-Proto && \
bin/magento config:set web/secure/use_in_frontend 1 && \
bin/magento config:set web/secure/use_in_adminhtml 1 && \
bin/magento config:set web/seo/use_rewrites 1 && \
bin/magento config:set catalog/search/enable_eav_indexer 1 && \
bin/magento config:set dev/static/sign 0 && \
bin/magento deploy:mode:set -s developer && \
bin/magento cache:clean
These are the Store front and admin URLs:
Tcharaaam!
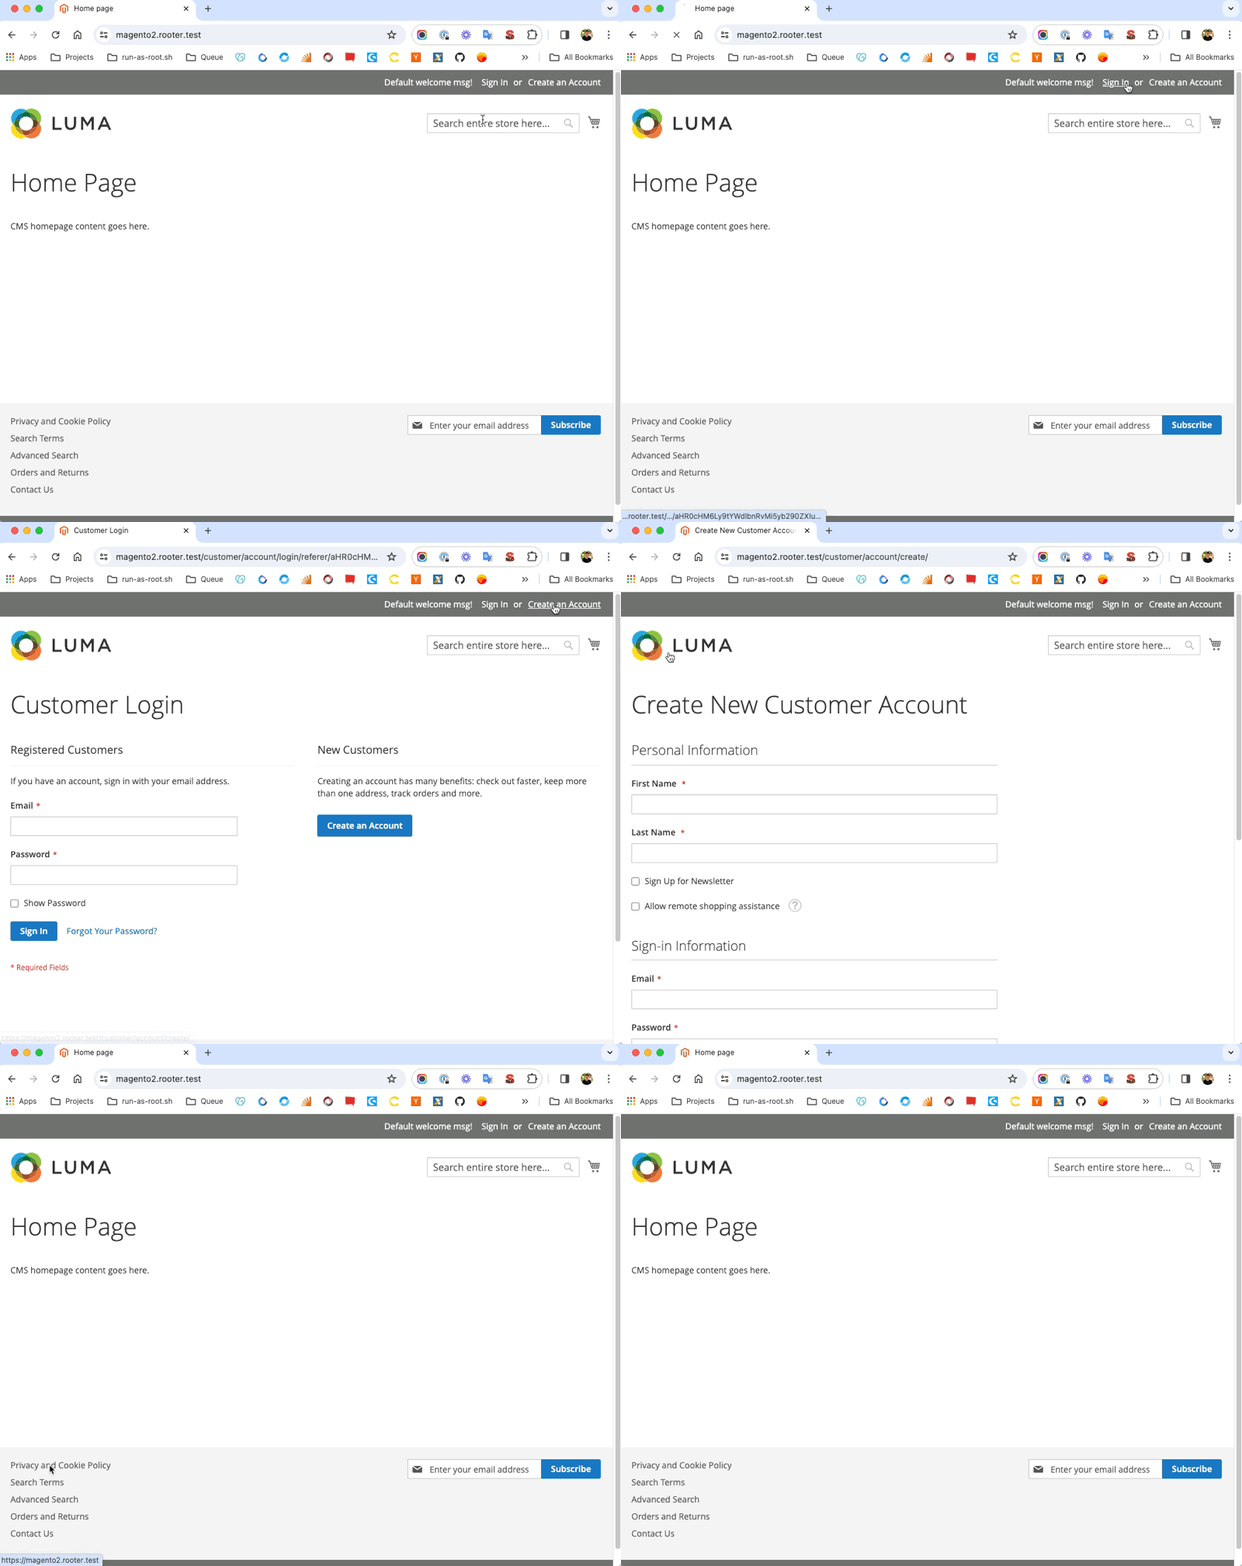
What really blows me away is the speed. Running Magento natively on Mac makes everything super fast and smooth.
The .devenv directory contains the data about the profile, nix garbage collector, the stack state, etc.
The .devenv/state directory is where some of the stack code lives, as for example, elasticsearch, mysql, php-fpm, nginx, rabbitmq, etc.
You don't need to touch these folders or the files on it.
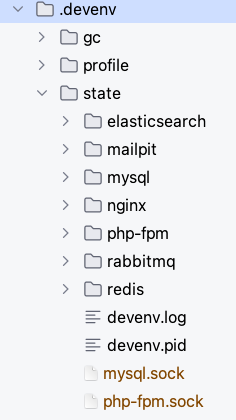
You don't need to version the files and folders below, so add them to your .gitignore file:
You need to version the files below:
Note: None of these files is required by rooter. They are required from devenv and direnv.
.env file:
Contains all variable environments that are used in your project stack.
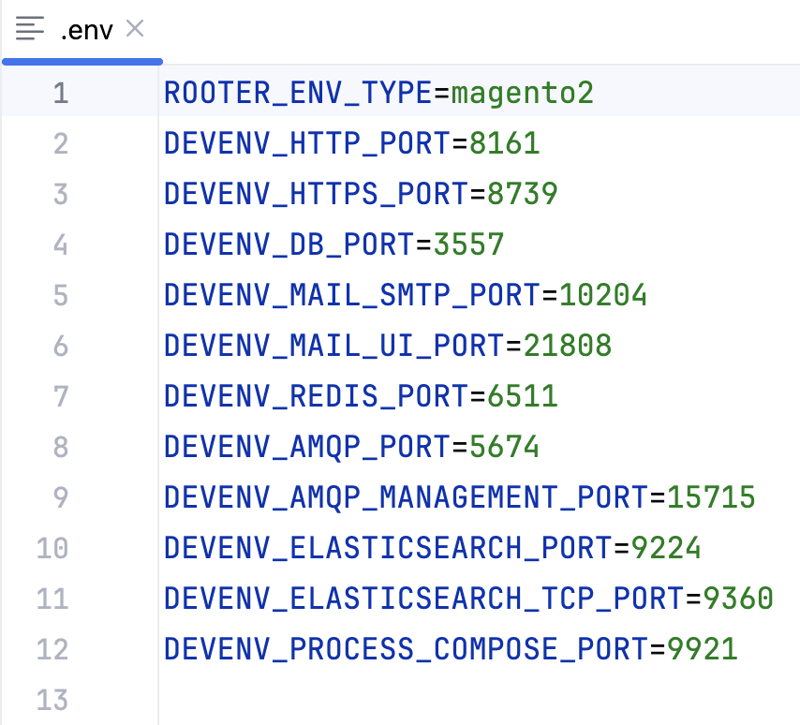
ROOTER_ENV_TYPE defines the type of the environment, it can be:
DEVENV_HTTP_PORT defines the http port used from the Nginx webserver
DEVENV_HTTPS_PORT defines the https (SSL) port used from the Nginx webserver
DEVENV_DB_PORT defines the Mysql/MariaDB/Percona database port
Note: In the current version of rooter, only Mysql* database is supported. Mysql* meaning any of the versions or forks of it, for instance MariaDB, Percona, etc.
DEVENV_MAIL_SMTP_PORT defines the mailpit SMTP port
DEVENV_MAIL_UI_PORT defines the mailpit user interface port
DEVENV_REDIS_PORT — the name already explains it :)
DEVENV_AMQP_PORT defines the RabbitMQ port that will be used in your application
DEVENV_AMQP_MANAGEMENT_PORT defines the RabbitMQ admin panel
DEVENV_ELASTICSEARCH_PORT defines the ElasticSearch port that will be used from your application
DEVENV_ELASTICSEARCH_TCP_PORT — the name already explains it :)
DEVENV_PROCESS_COMPOSE_PORT — the name already explains it :)
We'll see more about the process compose later.
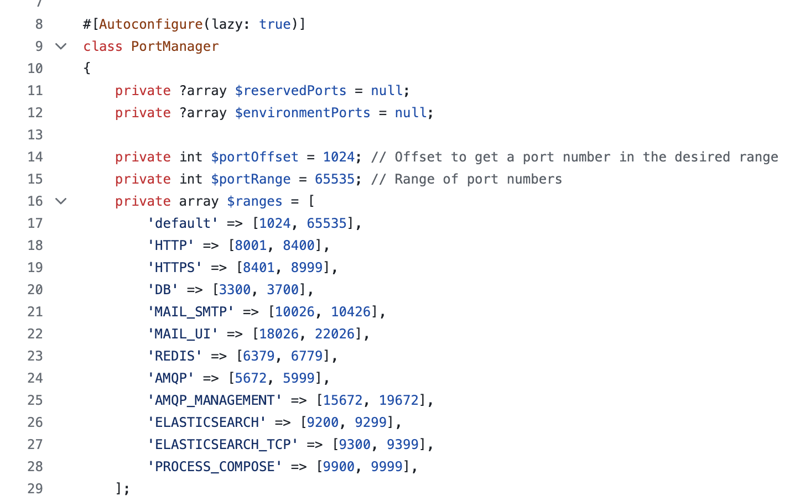
In case you noticed and are wondering, where the heck did the values of the ports defined in these variables come from?
Rooter has a mechanism that will get the available ports in your environment, taking into account the existing environments that were created by rooter.
It will assign ports using certain ranges, you can see how it works in this file, please look:
.envrc file:
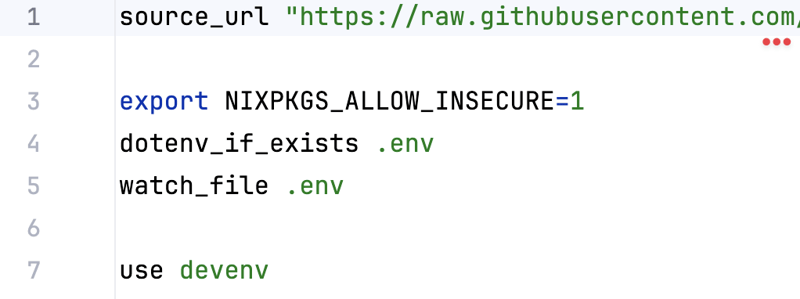
This file is used by the direnv tool.
It will load all the declared stack to the current terminal context.
devenv.nix file:
This file is used by devenv, it uses the Nix language to declare the environment. You can find more information about it here.
Let's get more details of the most important parts of this file:
{ pkgs, inputs, lib, config, ... }:In Nix, when you see this line, it's like setting up a template for a function. It says that the function will at least get these four things: pkgs, inputs, lib, and config. But it's cool because it can also get more stuff using the ... thingy.
let
  rooterBin = if builtins.getEnv "ROOTER_BIN" != "" then builtins.getEnv "ROOTER_BIN" else "rooter";
  composerPhar = builtins.fetchurl{
    url = "https://github.com/composer/composer/releases/download/2.2.22/composer.phar";
    sha256 = "1lmibmdlk2rsrf4zr7xk4yi5rhlmmi8f2g8h2izb8x4sik600dbx";
  };
  magerun2Phar = builtins.fetchurl{
    url = "https://github.com/netz98/n98-magerun2/releases/download/7.2.0/n98-magerun2.phar";
    sha256 = "0z1dkxz69r9r9gf8xm458zysa51f1592iymcp478wjx87i6prvn3";
  };
in {
The let...in block in the provided devenv.nix file defines a scope for local definitions that can be used later in the expression. This construct allows for declaring variables and their values before using them in the main body of the Nix expression.
Here's a breakdown of the let block and its components:
dotenv.enable = true;
env = {
  PROJECT_NAME = "magento2";
  PROJECT_HOST = "magento2.rooter.test";

  NGINX_PKG_ROOT = pkgs.nginx;
  DEVENV_STATE_NGINX = "${config.env.DEVENV_STATE}/nginx";

  DEVENV_PHPFPM_SOCKET = "${config.env.DEVENV_STATE}/php-fpm.sock";

  DEVENV_DB_NAME = "app";
  DEVENV_DB_USER = "app";
  DEVENV_DB_PASS = "app";

  DEVENV_AMQP_USER = "guest";
  DEVENV_AMQP_PASS = "guest";
};
The env block declares the environment variables.
The project's domain is determined by the PROJECT_HOST variable. So, you can access the project using the address: https://magento2.rooter.test
If you need to change the PROJECT_HOST variable value, follow the instructions here.
It is possible to have custom subdomains, you can see more info about it here.
Just a heads up, the database will use name, user, and password all set to app by default. Feel free to tweak these settings whenever you need.
Similarly, for RabbitMQ, the default user and password are both guest. You're welcome to adjust these as necessary.
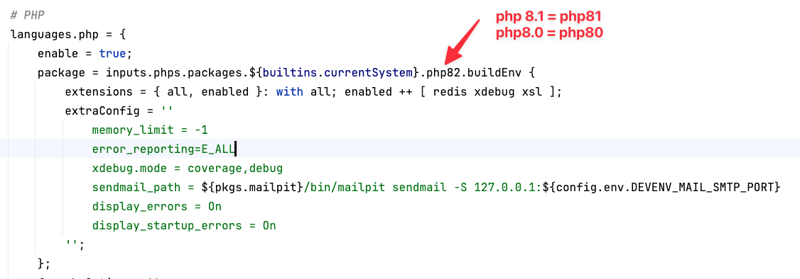
This is where we define and set up PHP. If you ever need to switch the PHP version, simply make the change in the highlighted section shown in the image.
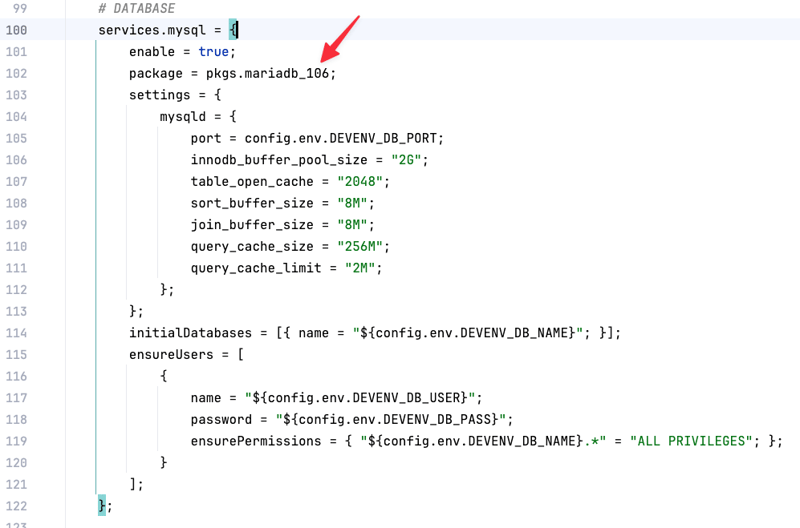
The same for MariaDb version. If you need a different version just change it.
To know what are the supported versions, you can search directly in the nix packages page, for example:
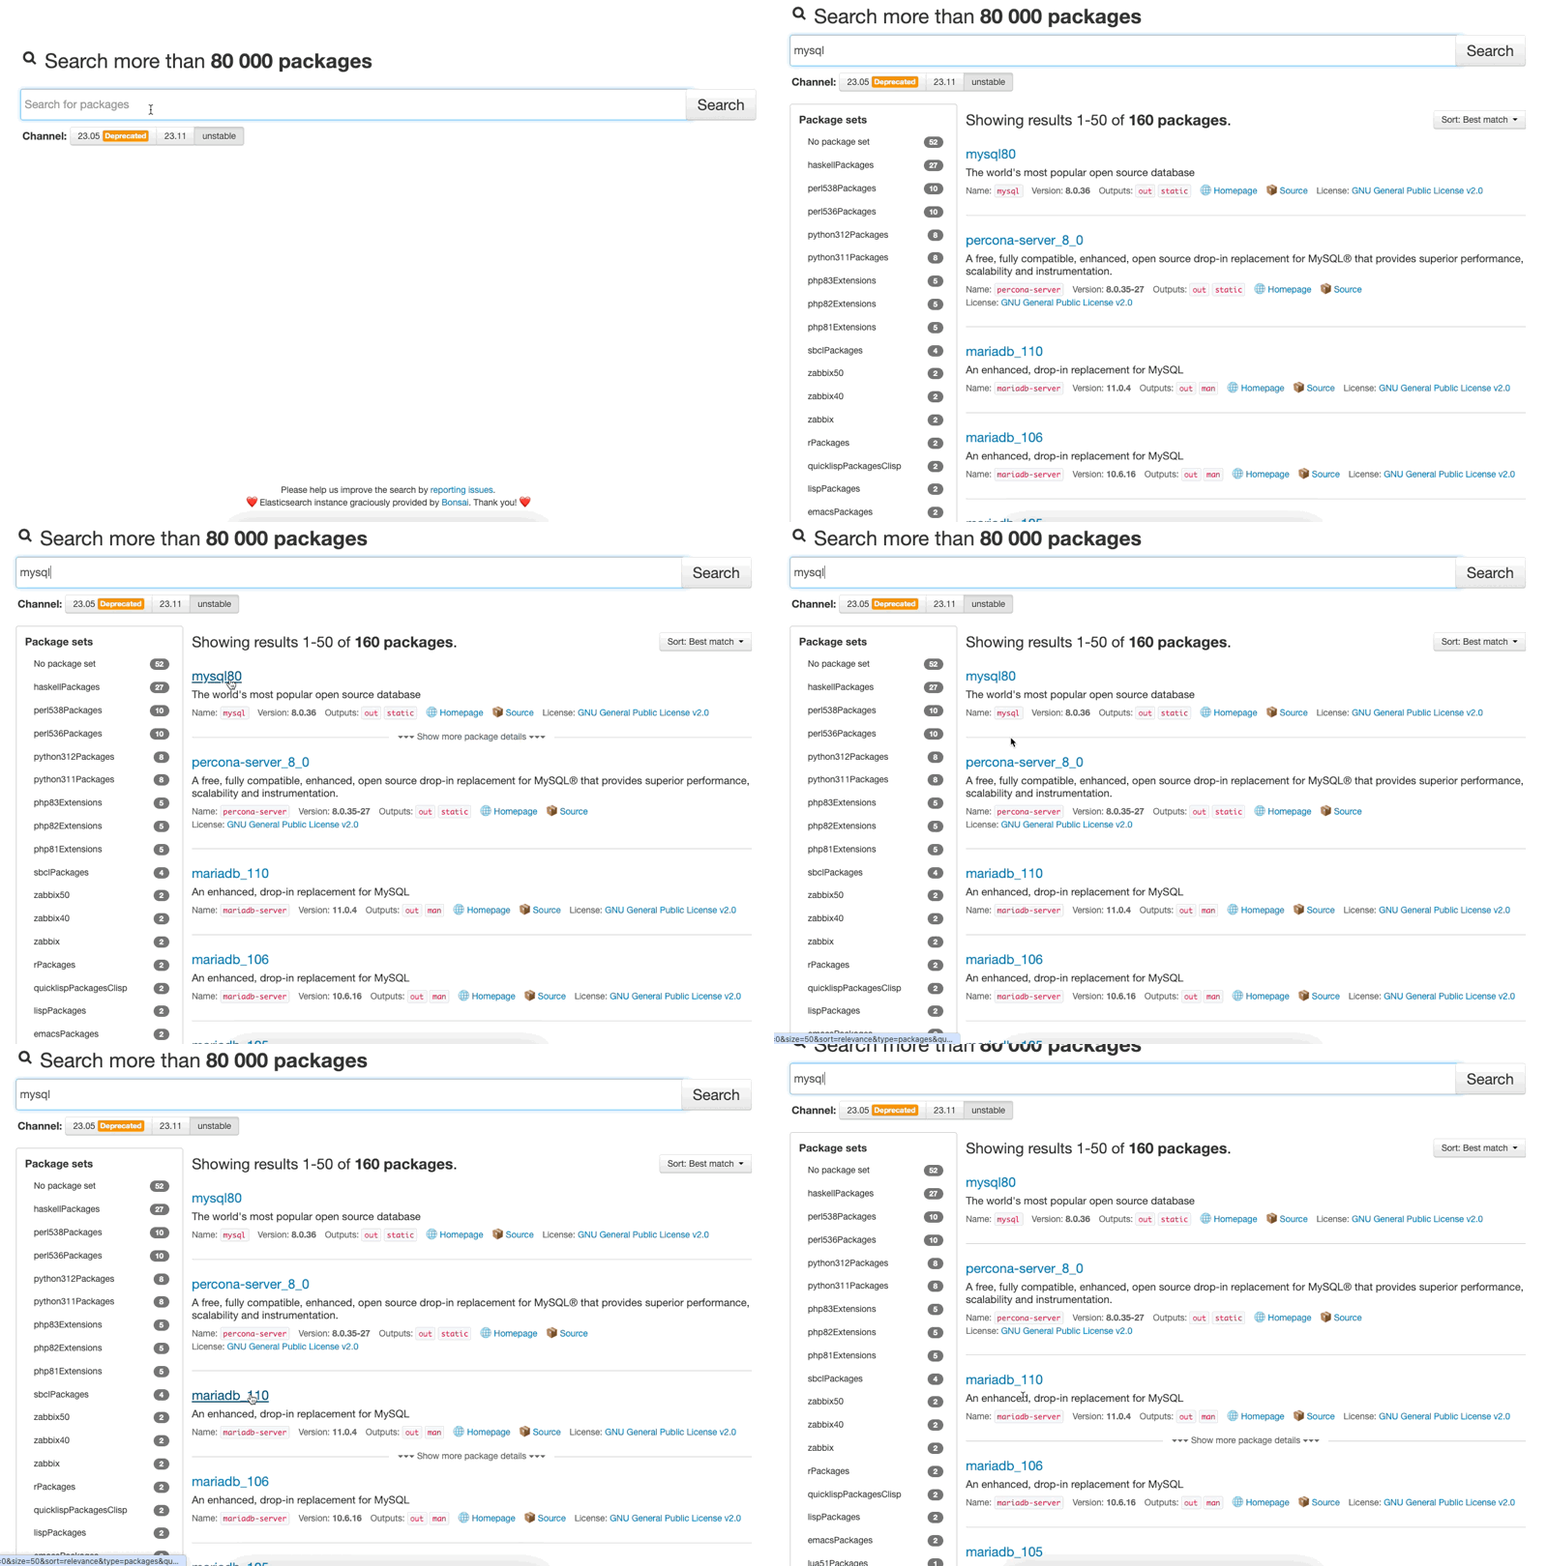
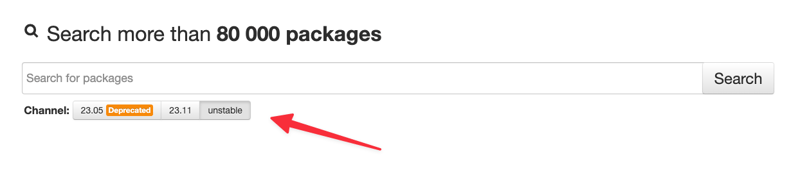
Note: Please note that we're using the unstable channel, it is the default channel for devenv, because it has more packages and with newer versions on it. So when you search the package, don't forget to select the unstable channel.
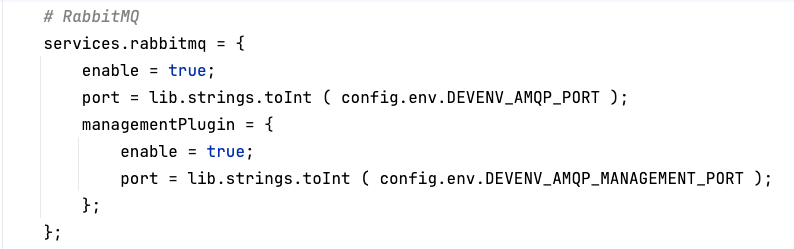
Last we have RabbitMQ declaration, if your project does not use it, just remove it from the devenv.nix file. We'll maintain it :)
devenv.yaml file:
This file is used by devenv. It will serve to declare what is the source of the packages. You can have multiple inputs, using different channels, for example.
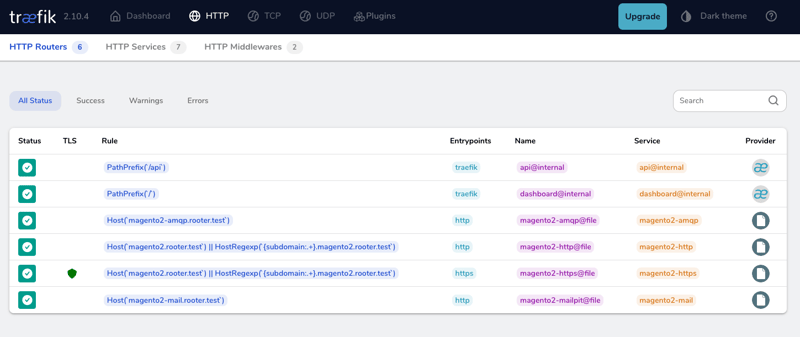
To access the traefik dashboard, just type rooter traefik:dashboard
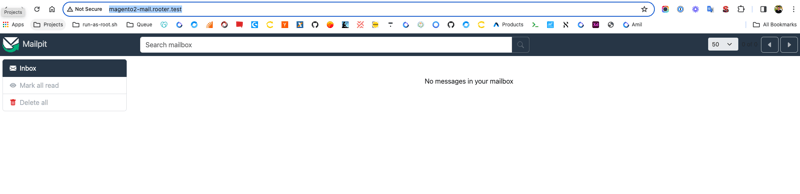
Mailpit is a fork of mailhog, it is newer and constantly receives updates.
It is per environment — it will always have a URL with this pattern:
https://PROJECT_NAME-mail.rooter.test
In our case it will be:
https://magento2-mail.rooter.test/
Note: The PROJECT_NAME variable is defined in the devenv.nix file.
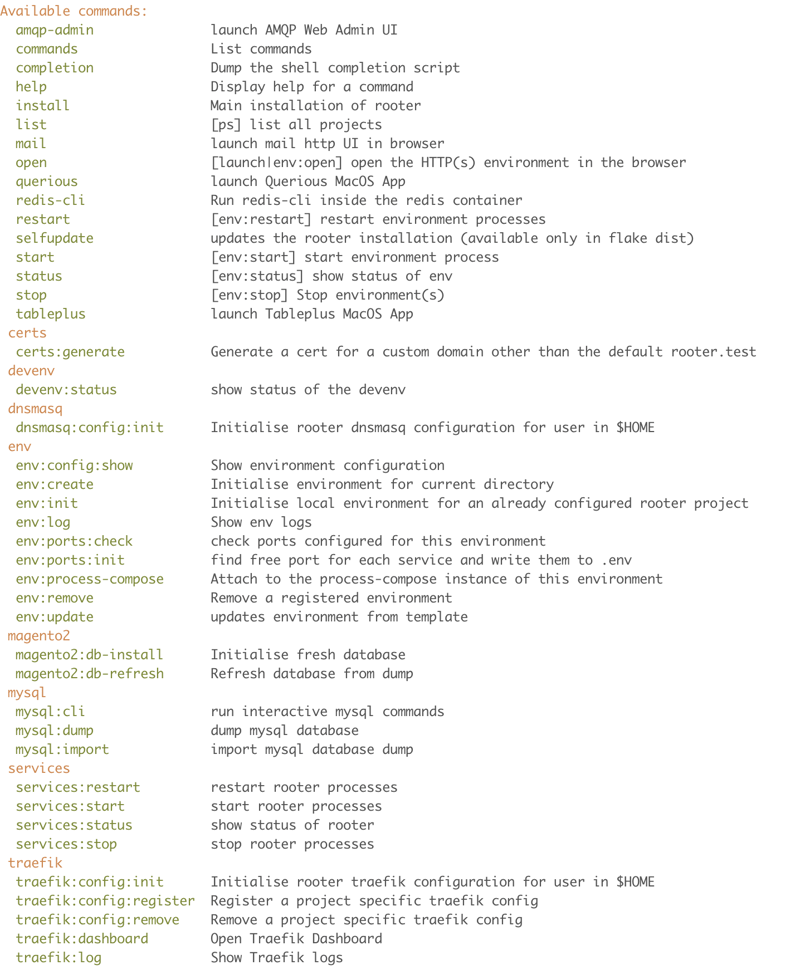
Just a heads up, to explore the existing rooter commands, you can simply run the command rooter commands. This will give you a list of all available commands. Happy exploring!
The only action you need to configure Xdebug is to set this environment variable in your terminal:
export XDEBUG_CONFIG="idekey=PHPSTORM-XDEBUG"You can append it with the command below:
echo 'export XDEBUG_CONFIG="idekey=PHPSTORM-XDEBUG"' >> ~/.zshrcNow you're able to debug your Magento 2 store on CLI or throughout web without any configuration.
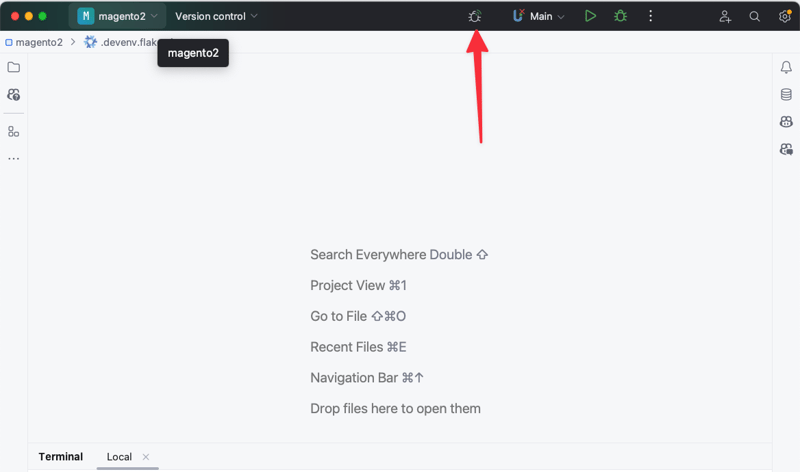
On PHPStorm for instance, you just have to click on the "Bug" button to start listening to Xdebug connections:
If you have any specific scenarios you'd like guidance on, like setting up Magento with multiple websites or store views, feel free to leave your question in the comments below. I'll do my best to assist you!
I hope you found this helpful! 👋
Image from Bill Jelen on Unsplash
Connect with our Magento expert to explore alternative development environments with Nix and Rooter.



30.09.26

16.09.26